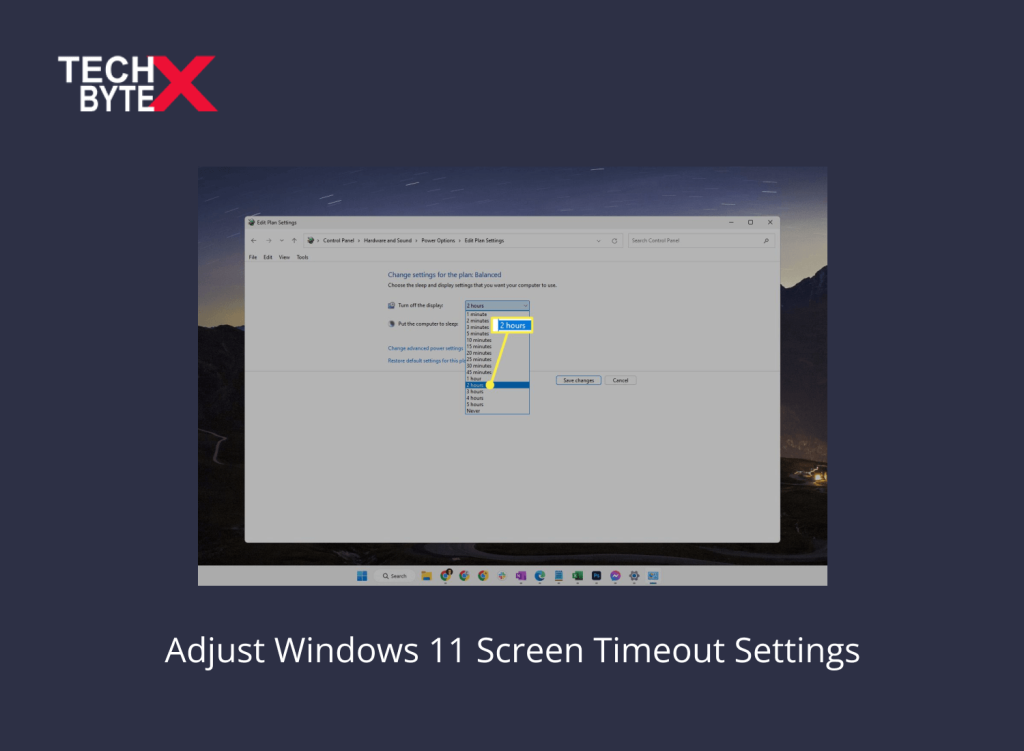
It’s quite normal to step away from your computer or laptop for some time, for various reasons. Yes, it is totally fine if you are not engaged in anything important or of a sensitive nature, like handling crucial data. To safeguard those few minutes from unauthorized access, you need to set a screen timeout on your computer or laptop. You can choose a period from one minute to five hours, or you can also choose the option to prevent the display from turning off altogether.
After learning about the time range of inactivity, the next question is how to adjust Windows 11 screen timeout settings. This article aims to address this concern by offering the three most effective and convenient approaches. Despite screen timeout adjustment methods, you will also explore some additional insights related to the said topic.
To make your Windows 11 screen work better for you, learn to tweak timeout settings with precision for improved comfort, enhanced productivity, and control security.
What is Screen Timeout and How Does It Differ From Sleep Mode?
At a glance, both display arrangements might look the same, but, in reality, both are different altogether. Let’s split the study into a parallel analysis by breaking down the differences and similarities between the two things.
Similarity:
Both serve the same purpose of conserving your system’s resources during the inactivity period.
Differences:
Here are a few significantly prominent differences between sleep mode and screen timeout:
Sleep Mode:
- Shifts the computer to a low-power state
- Pauses all ongoing operations
- Resumes activity with delay upon user’s interaction
- Deeper power saving
Screen Timeout:
- Turns off the display after the time users have chosen in a screen timeout setting
- Background process and operations continue
- Resumes upon user’s interaction right away
- Less power saving than sleep mode
Potential Reasons for Screen Turns Off Quickly in Windows 11
To address one of the most common user queries — why does my screen turn off so quickly in Windows 11? We have compiled potential reasons for the swift screen turn-off in Windows 11.
Let’s take a look below:
Reason # 1: Dynamic lock feature might be enabled
Reason # 2: You might have set a blank screen saver
Reason # 3: The graphic drivers are outdated
Reason # 4: External peripherals such as USB might conflict with power settings (rare case)
Reason # 5: You might have made some changes to UAC
Reason # 6: You have set the screen timeout setting to a lower value
Now that you have learned what causes what, let’s learn how to adjust screen timeout settings on Windows 11 using three different approaches.
Explore Top 3 Ways to Adjust Windows 11 Screen Timeout Settings
It is truly annoying when your computer screen times out very quickly, as you leave it alone. Most probably, it is its sign to show it misses you —just kidding!
To overcome this inconvenience, we have laid down three approaches. Users can employ them to adjust the screen timeout setting based on their comfort level.
So, let’s proceed to learn about the process of utilizing them.
1- Through the Settings App
Changing the Windows 11 screen timeout duration using the Settings app is an effortless process. By employing this method, you can easily adjust the screen timeout duration whether your device is on battery power or not.
Here is how to change screen timeout in Windows 11 through the Settings app:
Step 1: Right-click the Windows icon
Step 2: From the Quick Links menu, click Settings
Step 3: Navigate to “Power & battery” from the right pane
Step 4: Under the Power section, locate and click the “Screen and Sleep option
Step 5: Set a time duration on the “turn of my screen” option
Step 6: Alternatively, you can also directly access “Screen and Sleep”, using the following command in the Run window
This process will effortlessly adjust the Windows 11 screen timeout duration according to the user’s convenience and preference level.
2- Via Control Panel
Using the Control Panel to change screen timeout in Windows 11 is further sprouted in two routes: using the Power Options and the Advanced Power Plan settings.
So, here we go!
Method 1: Using Power Options
Step 1: Click on “Search”
Step 2: Type “Control Panel”
Step 3: Launch “Control Panel” from the search results
Step 4: Navigate to ‘Hardware and Sound’
Step 5: Click on “Power Options”
Step 6: Click on the ‘Choose when to turn off the display’ option from the sidebar
Step 7: Click on the first drop-down
Step 8: Adjust the “turn off the display” to set the screen timeout when on battery power
Step 9: Click on the second drop-down
Step 10: Select the preferred screen timeout duration for “when your device is plugged in”
Step 11: Once done, click on “Save” to implement changes
Method 2: Using Advanced Power Plan Settings
Step 1: Click on “Search”
Step 2: Type “Control Panel” to open it from the search results
Step 3: Navigate to ‘Hardware and Sound’
Step 4: Click on ‘Change plan settings’ located right next to your currently set power plan
Step 5: Click on ‘Change advanced power settings’
Step 6: This will launch a separate window for “Power Options”
Step 7: Navigate to “Display”
Step 8: Expand it, locate it, and click on ‘Turn off display”
Step 9: Click on the “time duration” located in front of the “On Battery” option
Step 10: Select a desired duration
Step 11: Again, click on the “time” in front of “Plugged in”
Step 12: Select the preferred duration
Step 13: Click on “Apply and OK” to save and implement the changes
Step 14: Exit the window
3- Using a Windows PowerShell Command
Here is how you can set the lock screen timeout in Windows 11 using the PowerShell command:
Step 1: Press the Windows key
Step 2: Type “PowerShell” in the search bar
Step 3: Select “Run as Administrator” from the appeared result
Step 4: This will open the User Action Control
Step 5: Click “Yes”
Step 6: Type or copy-paste the following command
Step 7: Assign the duration in seconds when the computer is plugged in
Step 8: Press the Enter key
Step 9: If you want to change the screen timeout duration when the computer is powered by a battery, execute the command given below
Step 10: Assign the new time duration in seconds
Other Methods to Consider
Here are further options you can also try to adjust Windows 11 Screen Timeout Settings:
- Using the Command Prompt
- Modifying the Registry
What to Consider Before Choosing a Specific Plan?
The screen timeout setting in Windows 11 aims for power saving. Here are a few tips for changing screen timeout in Windows 11:
Tip 1: Prioritize power-saving settings plans to consume as little power as possible during inactivity
Tip 2: For frequent computer use, set timeout to a short span of time
Tip 3: Choose the power plan that is optimal to meet your needs while adjusting the screen timeout
Frequently Asked Questions
Here are commonly asked questions related to controlling screen timeout settings in Windows 11:
How to increase timeout in laptop?
Here is how to increase display time in laptop:
- Right-click on anywhere on the Desktop
- Select “Personalization”
- Navigate to “Lock Screen”
- Select “Screen time-out” settings
- Locate and click “Screen”
- Increase screen timeout in the drop-down under Screen
How can I change my Windows 11 screen timeout settings using the Registry Editor?
- Launch the Run box by simultaneously pressing Win + R
- Type regedit in it
- Hit Enter
- Click on “Yes”
- Go to the right pane
- Double-click the “Attributes key”
- Modify the Value data to 2
- Click on “OK” to save and implement the change
How to change screen timeout on iPhone?
Here is how you can effortlessly change screen timeout on your iPhone:
Access Settings > tap Screen Time > set app limits > confirm.
How to Change Screen Timeout in Windows 11?
Read the article that aims to address the same query.
How to turn off screen timeout on my Android?
Here is how you can turn off screen timeout on your Android phone:
- Launch the “Settings” app on your Android device
- Navigate to “Lock Screen” or “Security & Location”
- Choose the “Screen Timeout” or “Sleep” option
- Select “Never” or choose the longest time turning-off option on Android
What are the Different Screen Timeout Options on Windows 11?
There are various screen timeout options available in Windows 11 including, 1 minute, 2 minutes, 5 minutes, 10 minutes, 15 minutes, and 30 minutes. It is significant to note that some devices are designed with enhanced screen timeout options like 1 hour and 2 hours.
What are the Default Screen Timeout Settings on my Windows 11?
The default screen timeout setting in Windows 11 is 15 minutes. Although you can change it according to your needs and preferences.
Why should I change the screen timeout setting on Windows 11?
It is a good and proactive practice to change the screen timeout setting on Windows 11. It can help conserve the battery life of your laptops, tablets, smartphones, and other digital gadgets. If you set the screen timeout setting for a shorter time, it will help reduce energy consumption. Despite conserving system resources, it can also help you be protective when leaving the system unattended when handling sensitive data.
Is there any limit to making changes in screen timeout settings in Windows 11?
No, there is no limit to making changes in screen timeout settings in Windows 11. You can edit Windows 11 screen timeout settings as frequently as desired.
Bottom Line
Hopefully, this helpful guide has served its purpose in assisting you in learning three effective and handy ways to change screen time in Windows 11. TECHBYTEX provides convenient and reliable approaches, such as using the Settings app, via the Control Panel, and through PowerShell Command. The respective step-by-step instructions help you understand the process precisely.
Users can set screen timeout settings that best suit their professional or social needs. Screen timeout Windows 11 allows users to opt for different screen timeout plans, ensuring the conservation of system resources.


